Example
Here we'll create a medium sized City showcasing the main features of CitySketch.
Result
| Finished City before rendering | Finished City after rendering |
|---|---|
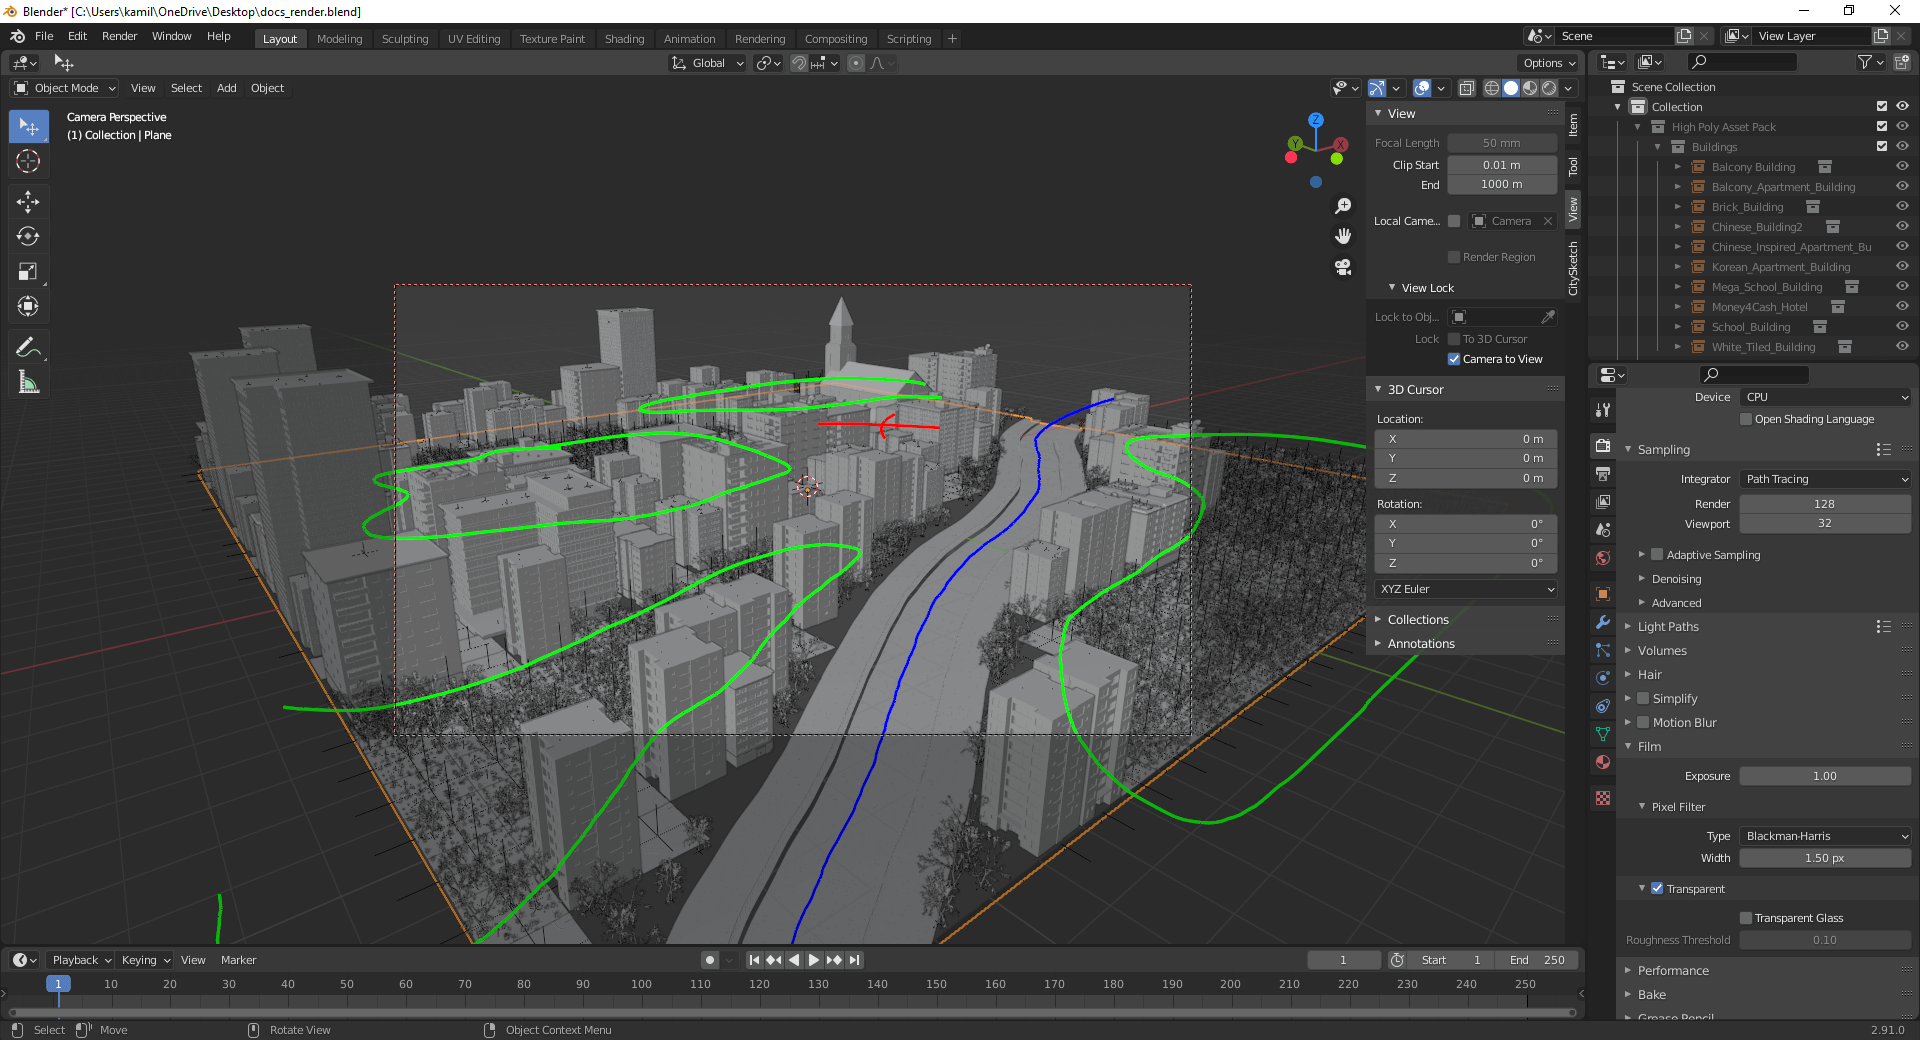 |
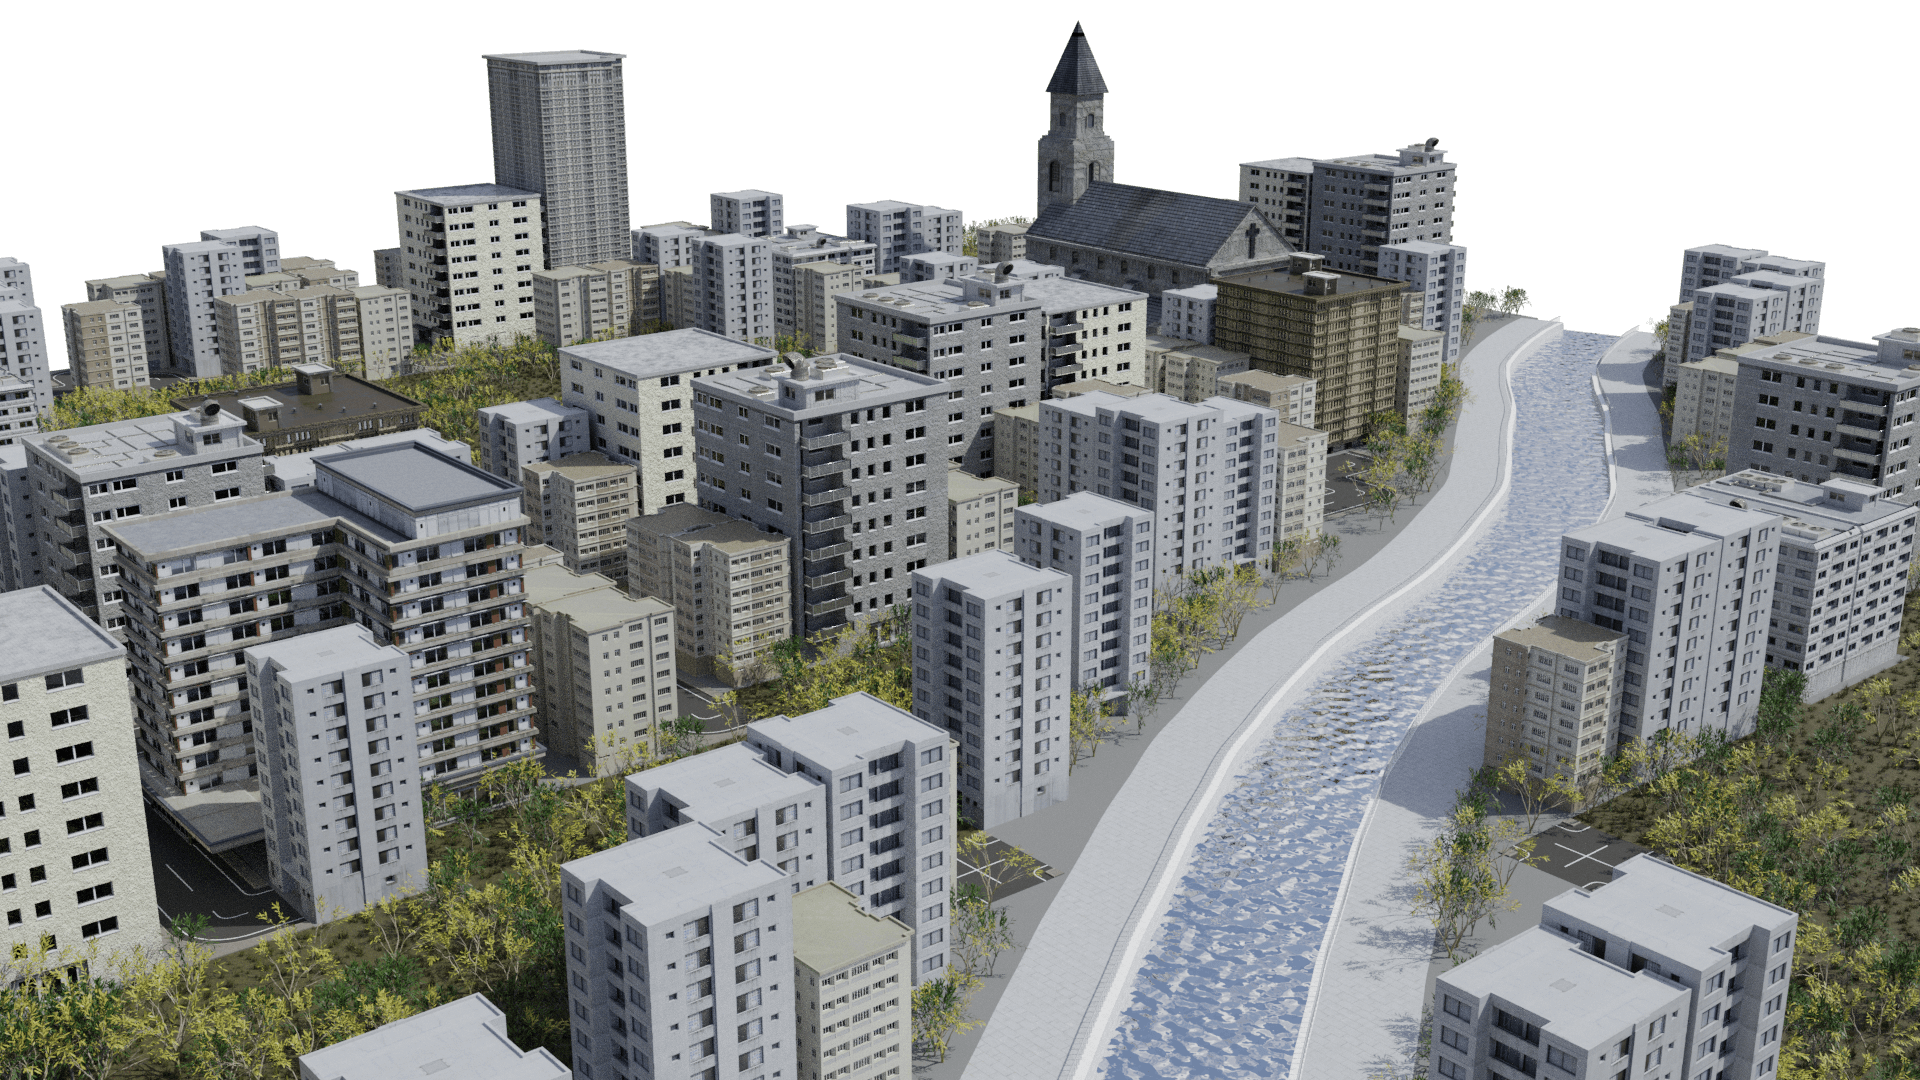 |
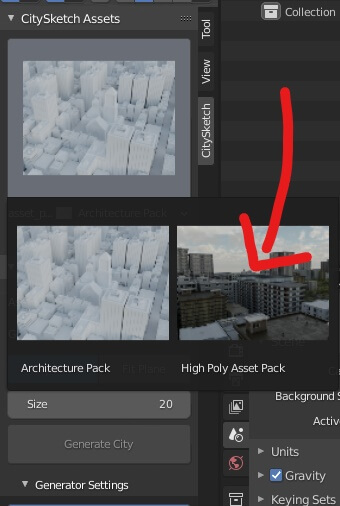
1. Import the High Poly Asset Pack
In this Example we'll be using the High Poly Asset Pack which contains highly detailed assets that will make the city look more realistic.
- Navigate to the Add-on Panel.
- At the top you will find a section for the Assets including a preview image that should be open by default.
- Select the
High Poly Asset Packeither from the dropdown or by clicking on the preview image. - After a short while you should see the imported Assets in the
outliner. The reason they don't appear in the3D Viewist, because the import optionimport hiddenis enabled by default. Don't worry, the city will be visible after generating or when rendering.
{info.fa-info} By default the buildings will only be visible when generating a city, or when rendering. We recommend to keep it that way.
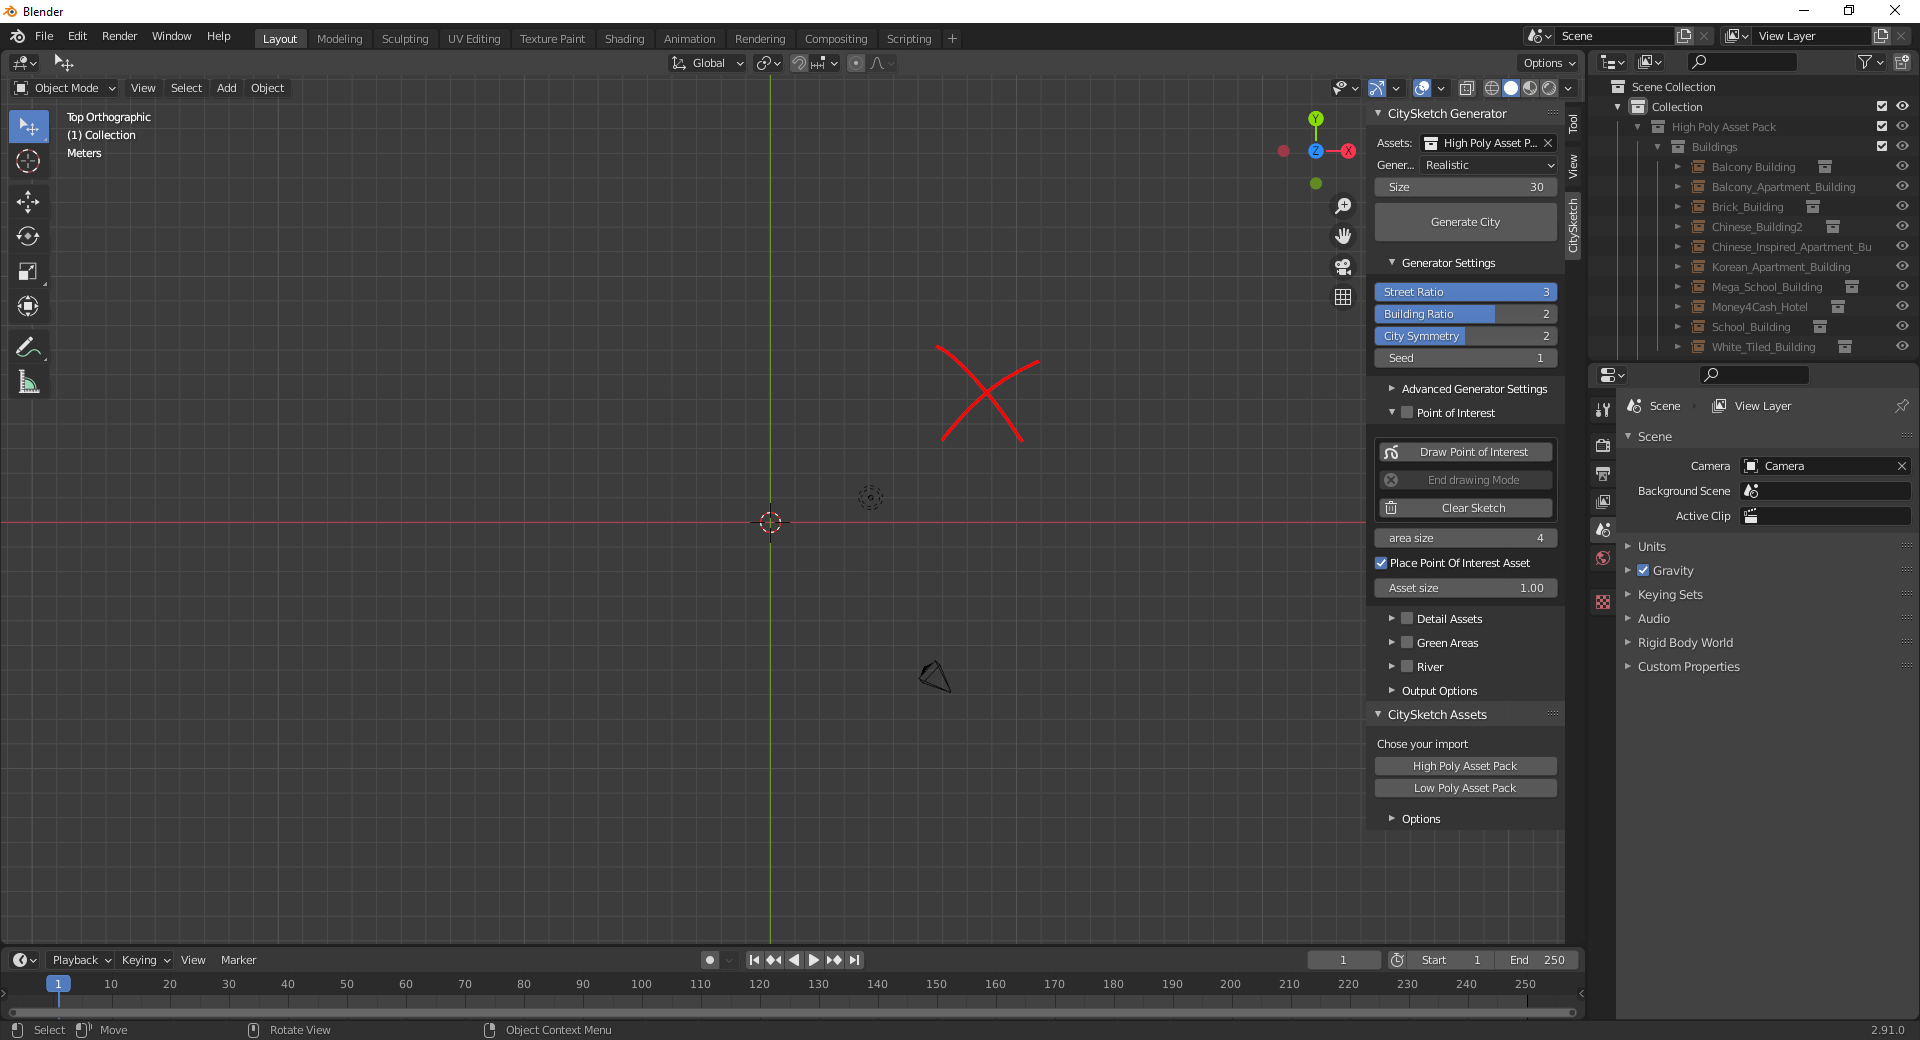
2. Adjust the settings
The next step is to adjust the settings. For the sake of this example, lets keep the city medium sized in order to keep the generation duration relatively low.
-
Keep the default generator
RealisticAt the very top of the panel, you will see a dropdown that allows you to choose the generator for the city. We'll keep the default setting, as this generator creates the most believable cities. You are free to try any of the availible generators.
-
Next, set the
sizeto30This controls the overall size of the City. In this case, the City will be 30x30 Blender Units big.
-
Keep the default
generator settingsThese settings allow you to change the density and symmetry of the city/roads. In this eaxmple we'll stick with the default settings, that will give us a very balanced and believable city.
-
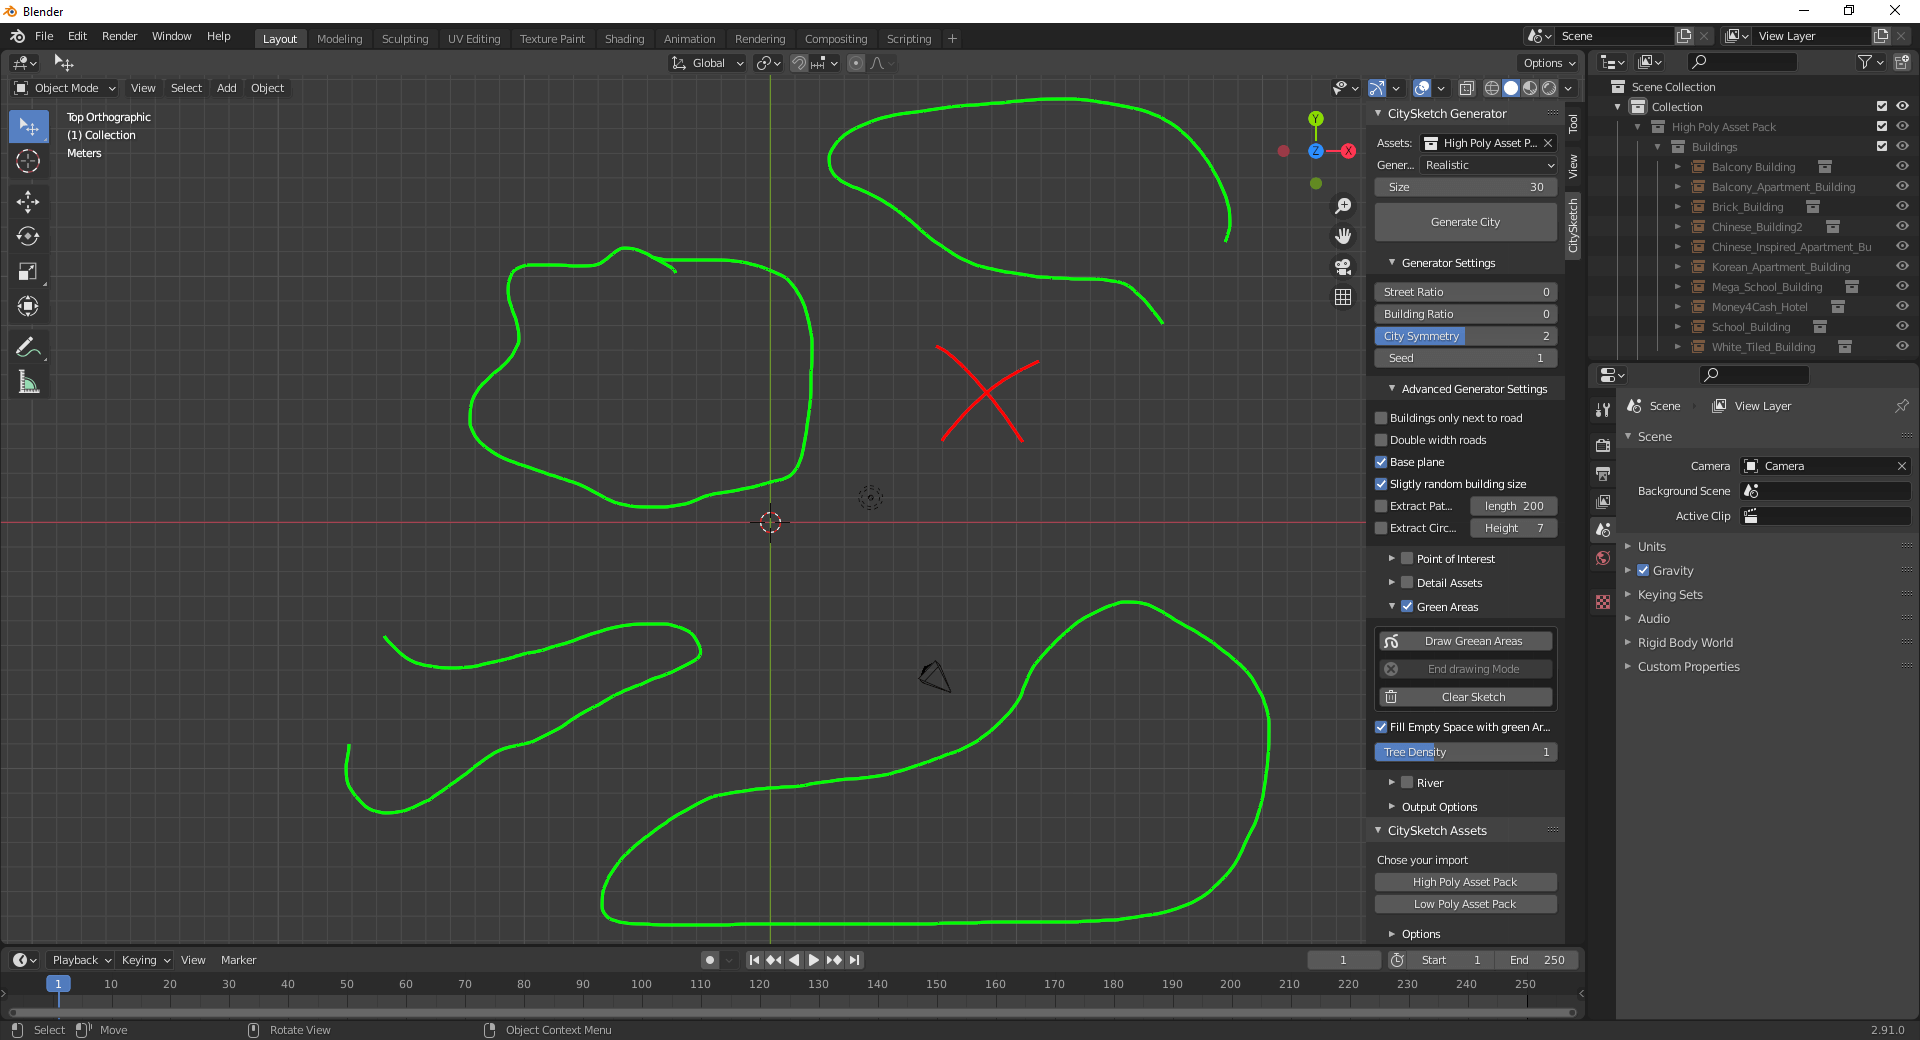
Enable
Point of Interest, enter into top view (numpad 7), pressDraw Point of Interestand draw an XThe X specifies the location of the point of interest. The point of interest is a special building (a church by default) that only spawns once. Additionally a empty area aroin the Church will be generated.
-
Repeat the same for the green areas. In this example we'll draw a couple of parks.
For every shape you draw a green area will be generated. This means that the area enclosed by your strokes will be filled with green zones assets. By default these asset are trees and bushes. However, its totally possible and straightforward to add your own assets.
-
Repeat the same one last time for the river. In this example we'll draw a single river flowing though the city.
The river will be generated along the line you have drawn. Its possible to add multiple rivers, however, you have to be careful when crossing rivers since the intersection wil not look good in the current version of CitySketch.

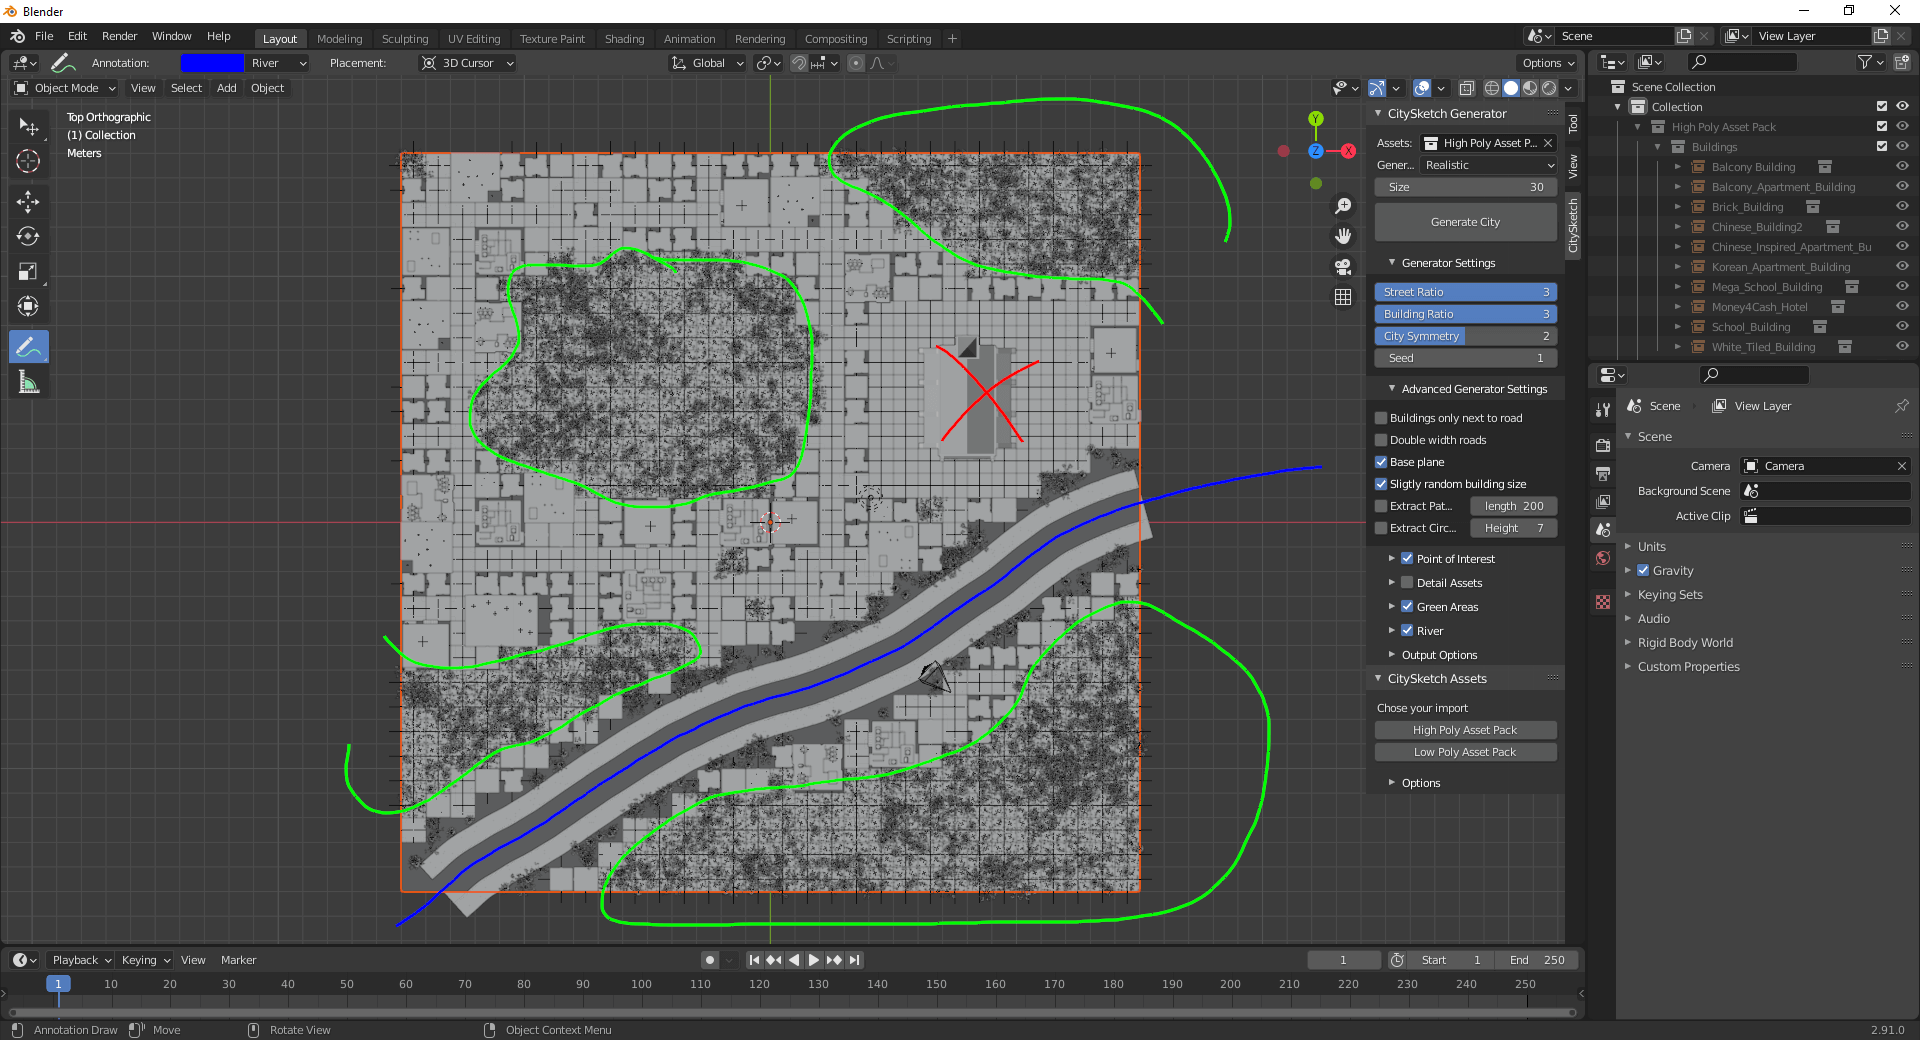
3. Press Generate
Swap to cycles (we strongly recommend it) and press Generate (located at the top of the Add-on panel). CitySketch will take your drawings into account, provided the structures have been activated (indicated by the ckeckbox next to the name). You can immediately start rendering, but its probably best to adjust the lightning and camera angle first.
{info.fa-info} By default CitySketch will override your previous City, you can change this behaviour in the
Output OptionsTab.
{warning.fa-info} Sometimes CitySketch might freeze when generating the City (blender stops responsing). This does not mean blender stopped working, give it a couple of seconds and it should return back to normal.